The iLO interface on one of our servers complete broke and we had no way of accessing it, and it wasn’t updating through the HP SPP media. Fortunately I was able to update it through SSH.
However, because the firmware on the iLO interface was so old, it needed to be upgraded to an earlier version first before updating to the latest. This is documented on the HP Support Centre.
Download a iLO3 1.2x firmware. It will come with the filename ilo3_12x.bin, with x being the minor version number. Upload the file to a web server that can be accessed by the iLO interface. Now, open a SSH session and connect to the iLO IP address. Run the following commands, replacing webserver with your web server FQDN/IP and the filename with the file you downloaded:
1
2
cd map1/firmware1
load -source http://webserver/ilo3_12x.bin
The iLO will now update and reboot, disconnecting you from SSH in the process. Once it’s back up, it will be upgraded and ready for the final upgrade through the HP SPP.
Create a host RSA key with ssh-keygen -t rsa and entering /etc/ssh/ssh_host_rsa_key as the directory. Do not worry about a passphrase. After this is done, start the SSHd service with service sshd start.
Note: This isn’t the most secure as you are logging in as root.
Reset the root password with passwd.
Install packages and dependencies
Install the latest pkg package with pkg bootstrap -f. After this has installed, upgrade with pkg2ng. Next, install the packages:
1
2
pkg install xorg openbox tightvnc linuxdcpp
pkg install libiconv expat
For some reason Pango needs to be reinstalled, so reinstall with:
1
pkg install -f pango
Set up VNC
Create a directory for the xstartup script and then edit the file.
1
2
mkdir ~/.vnc
edit ~/.vnc/xstartup
Place the following in the xstartup script and save:
1
2
3
4
#!/bin/sh
xrdb $HOME/.Xresources &
openbox &
xterm -bg black -fg gray &
Make the script executable:
1
chmod +x ~/.vnc/xstartup
Get rid of setup quirks
There are certain things that linuxdcpp doesn’t like, so run the following commands:
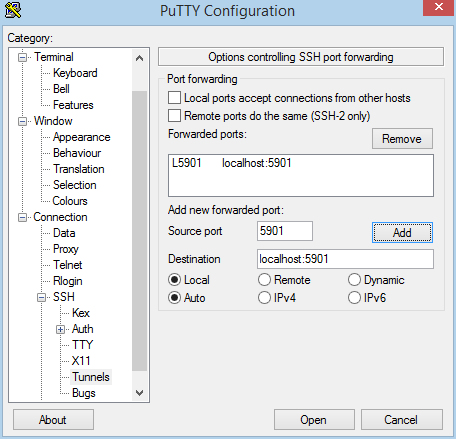
Go to Connection > SSH > Tunnels and create a tunnel on port 5901 for VNC. Don’t forget to press “Add”
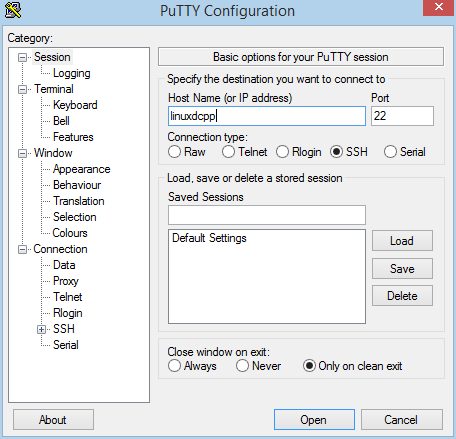
Press “Open” to connect. Enter root for the username and then type the password you specified earlier with passwd.
Now, download and install TightVNC and open the viewer. Connect to localhost:5901. Type the VNC password and press enter. You will now be connected to a remote desktop.
I’ve been running a little short on storage space lately, so I decided to take the plunge and order a new storage system. Previously I was using a Synology DS413 with four 3TB Hitachi disks and I was hoping to get a Synology again for my new system, however once you want a Synology unit with more than four bays the price goes up quite significantly.
After a lot of research and reviewing of similar builds, I ended up with the following components.
Component List
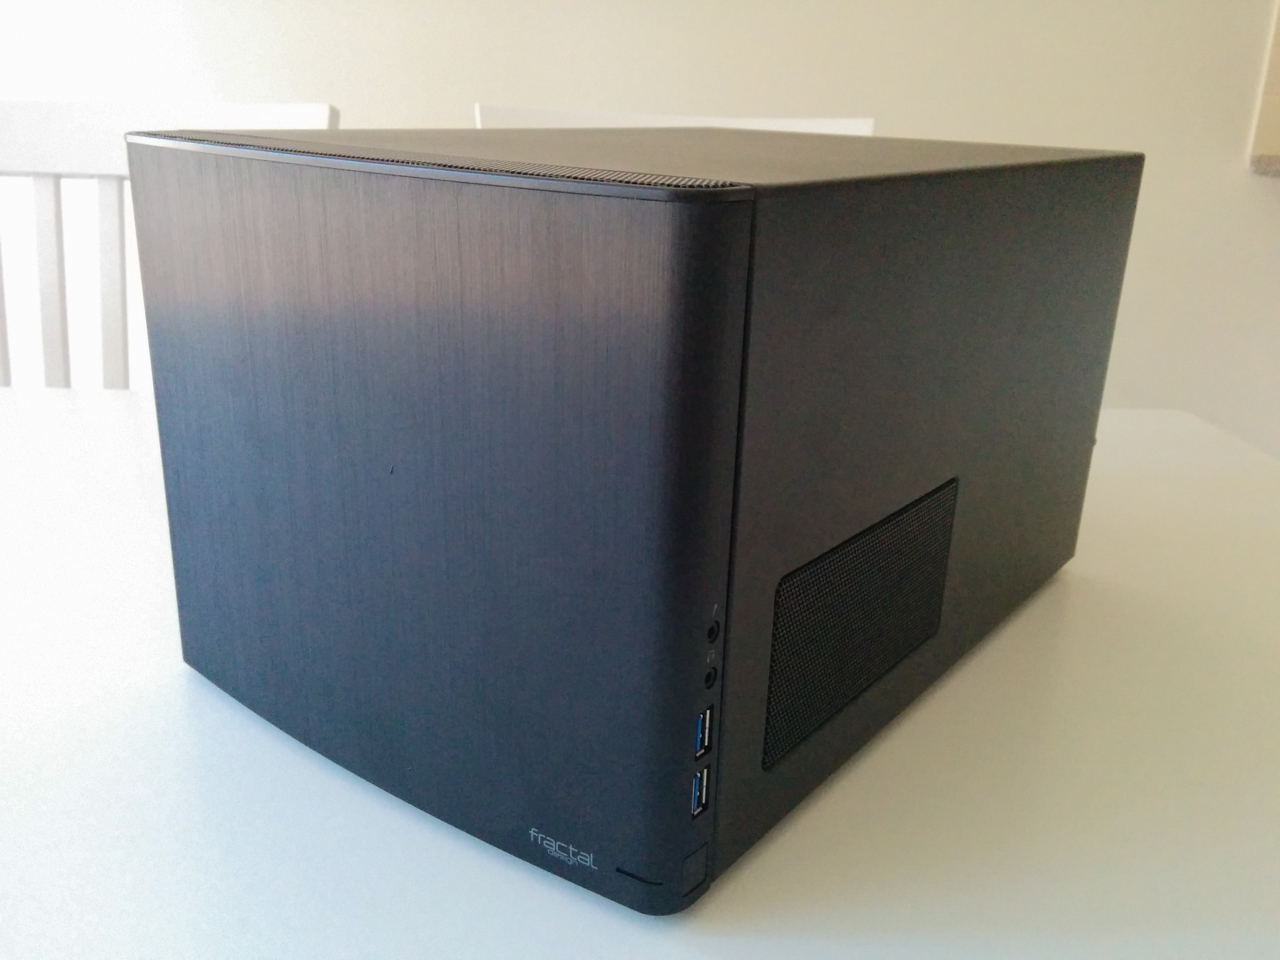
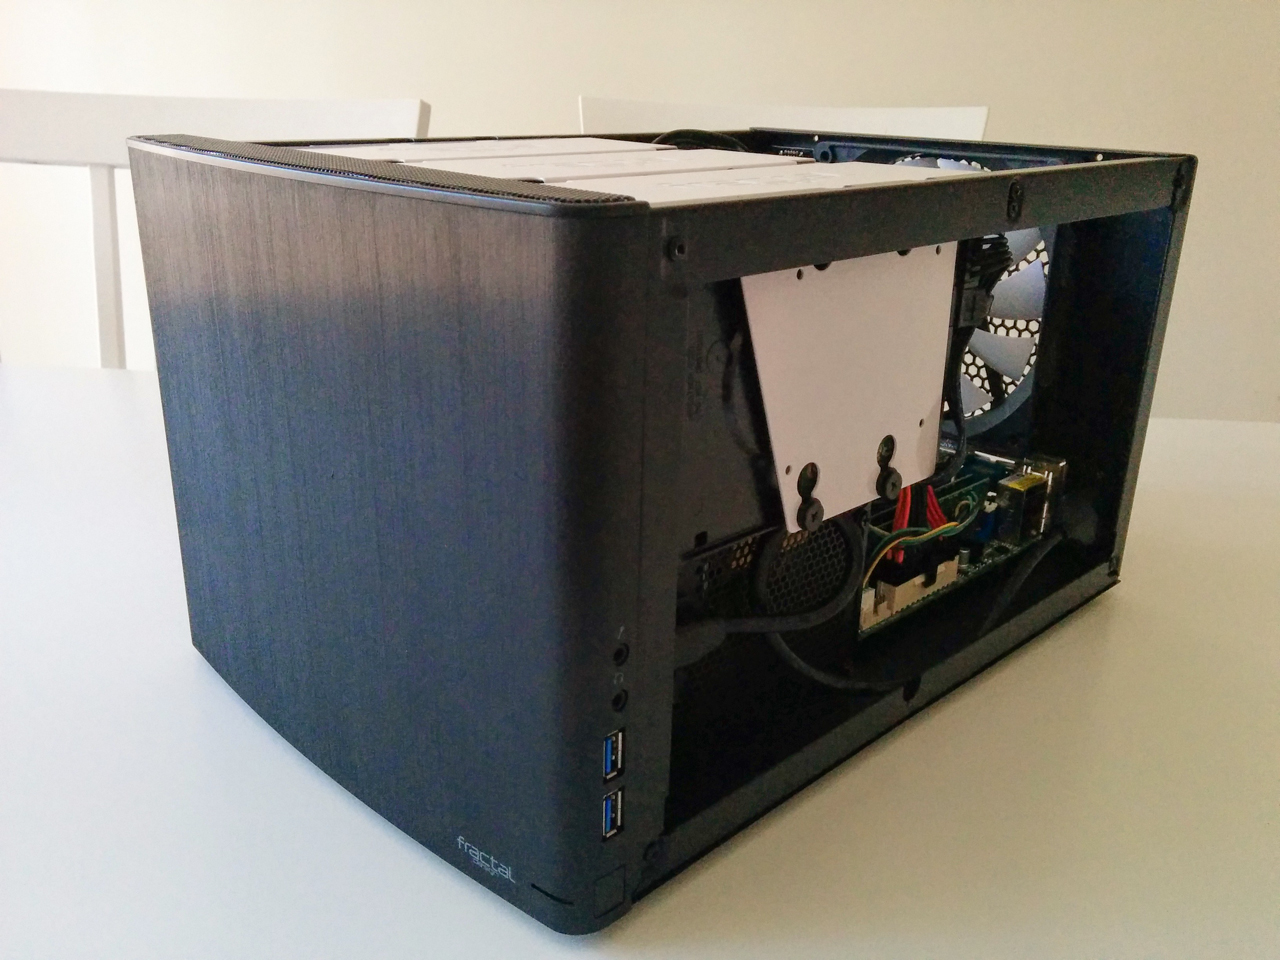
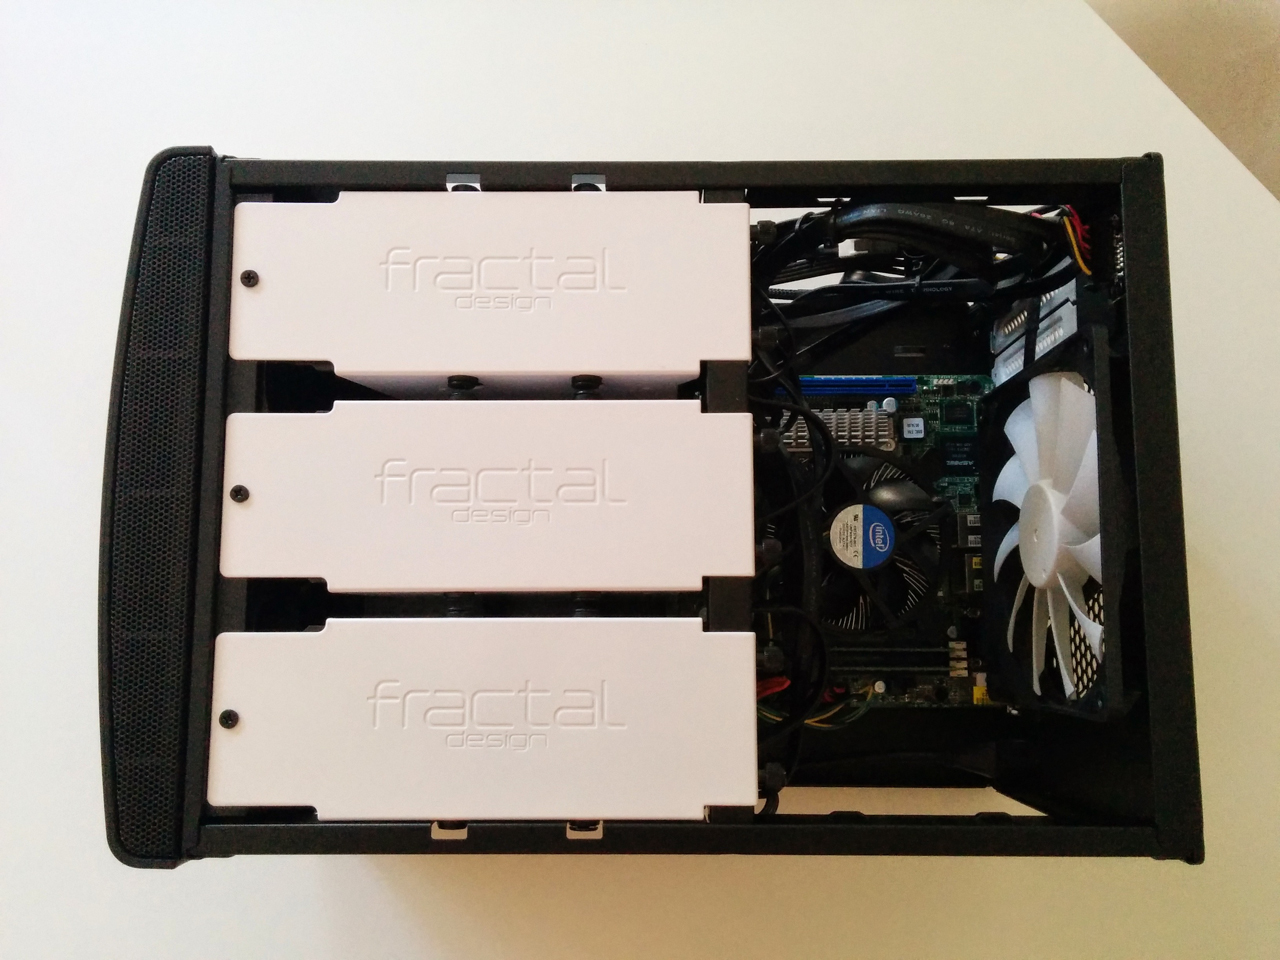
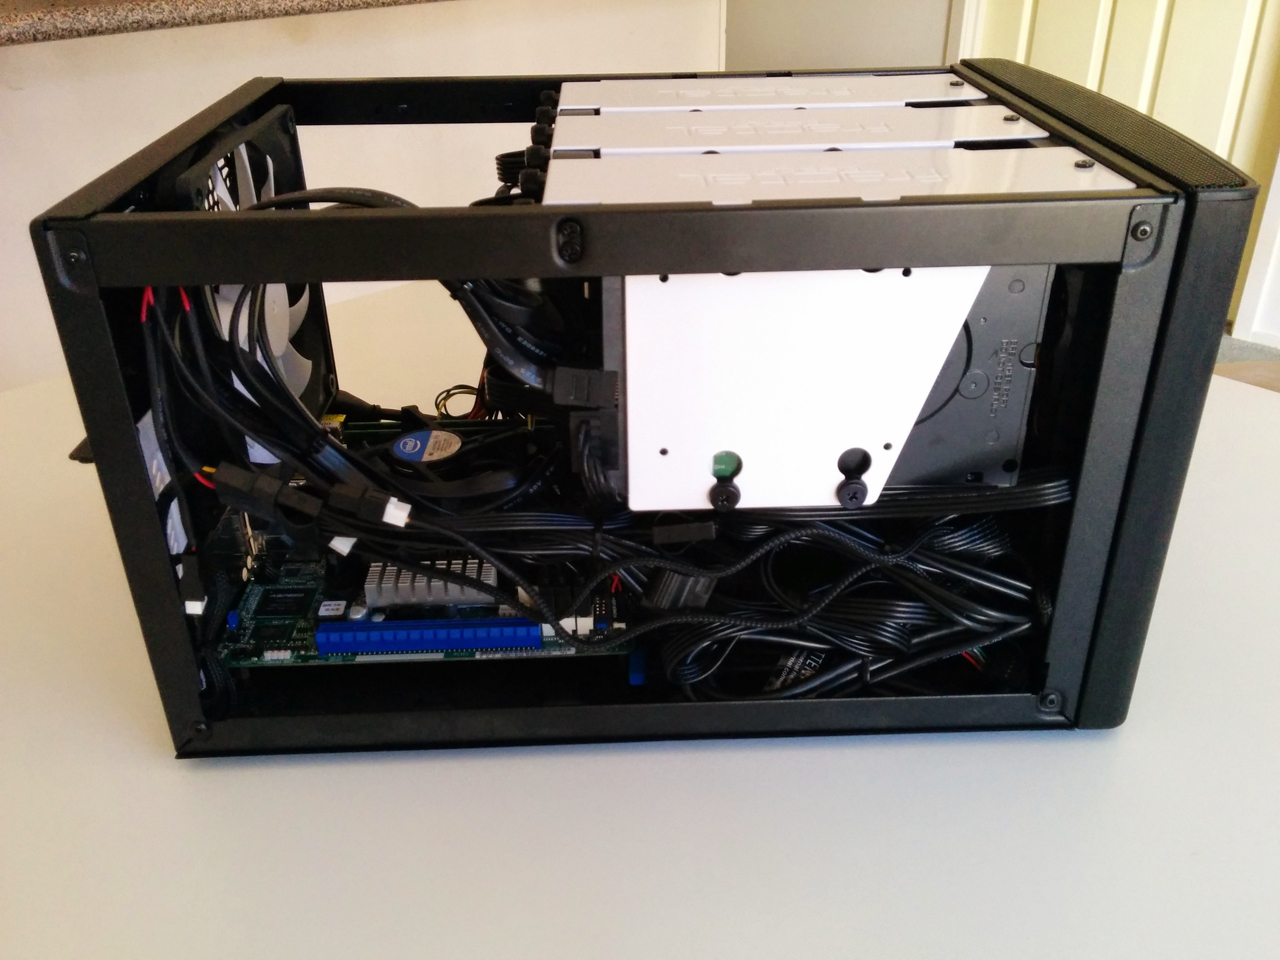
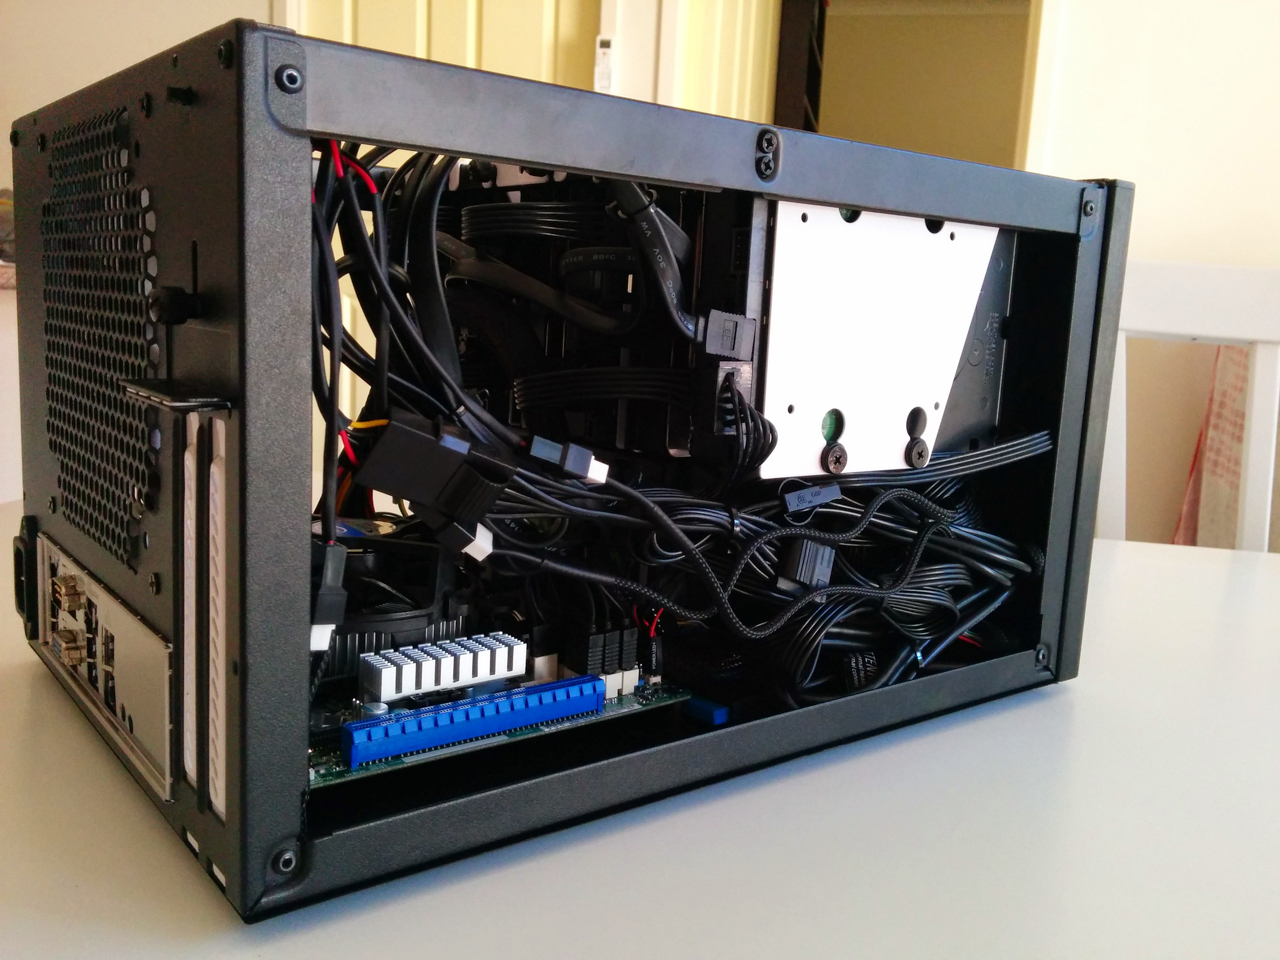
Case - Fractal Design Node 304
This case fits six drives, a Mini-ITX motherboard and a standard ATX power supply. Cable management is quite difficult however the entire case is less than 20L in size which is only marginally larger than my existing Synology unit.
Motherboard - ASRock E3C224D2I
Unfortunately there isn’t much choice when it comes to server-grade Mini-ITX motherboards, however this one fits the specifications quite nicely. It has six SATA ports (2 x SATA2, 4 x SATA3), two ECC DDR3 slots, a BMC chip and two Intel GBe ports. The other option was an Atom Avoton C2550 motherboard however I wasn’t too keen on a non-upgradable CPU and using a Marvell storage controller over an Intel one.
CPU - Intel Core i3-4160
Surprisingly, the Core i3 supports ECC RAM! I was originally going to get the Core i3-4150 however this model was on sale and ended up being cheaper.
Memory - Kingston KVR13E9K2/16I
After reading lots of stories of incompatible memory, I decided to go with RAM sticks that somebody else had tested.
Power Supply - Corsair CX600M Modular
80+ Bronze certified and six SATA power connectors. I would have rathered an 80+ Gold certified power supply but the price difference was too great.
OS Disk - SanDisk Cruzer Fit 16GB
A nice and small USB key that can be installed directly on to the motherboard.
Storage Disks - 6 x Western Digital Red 6TB WD60EFRX
Originally I was going to order Western Digital Green 6TB WDEZRX drives and run WDIDLE3 on them to fix the LCC issue, however I found that the two models were fairly close in price and the Reds have a longer warranty.
OS - FreeNAS
For the OS, I chose FreeNAS after reading a lot about ZFS. The drives are configured in a RAID-Z2 configuration (similar to RAID6) which can tolerate two disk failures. This gives me 36TB of raw storage and 21.8TB of usable storage.
Performance
To test performance, I had two panes open in tmux and ran one command in each window:
Watching the zpool iostat output whilst iozone was running, I saw that my maximum read speed was around 550-600 MB/s and my maximum write speed was around 300-350 MB/s.
Thoughts
The next upgrade will be 10gbit networking, however this is a long way off and not really needed at the moment. With a switch upgrade I will be able to use teaming but there is generally only one client accessing the server at once which negates this.
The following script generates a report of all datastores and their multipathing policy. This was extremely useful when fixing up some datastores to use best practices with our 3PAR systems.
I’m guilty of only updating firmware and drivers on my devices when problems arise. I’m sure most of us do this. Bad practice! The guide in this post shows how to update a ProLiant system (blade, pedestal or rackmount) with the HP SPP and latest drivers.
BEFORE YOU DO ANYTHING: Put the host in maintenance mode and move the virtual machines off! This probably doesn’t need to be said, but hey.
HP VibsDepot is a great resource for the currently supported firmware and driver recipe for ESXi as well as links to the required files. The most current support recipe document is located at http://vibsdepot.hp.com/hpq/recipes/HP-VMware-Recipe.pdf (pdf). First things first; you need to get the model of your HBA and which driver it uses. You can do this by connecting to the host with SSH.
If you don’t have SSH enabled, press F2 at the ESXi screen and login with the root credentials. Then, go down to Troubleshooting Options and select Enable SSH. You can then exit out of the menu by hitting the escape key a few times.
Open up your SSH client and connect to the host, then:
# ls /proc/scsi
You will see possibly two or three devices. My HBA’s are Emulex branded, so mine shows as lpfc820.
# cat /proc/scsi/lpfc820/1
I used tab complete after the final slash to get the HBA number put in automatically. The info received:
1
2
3
4
5
6
7
8
9
10
11
12
13
14
15
16
17
18
Emulex OneConnect FCoE SCSI 8.2.1.90.28
HP FlexFabric 10Gb 2-port 554FLB Adapter on PCI bus 0000:04 device 02 irq 184 Logical Link Speed: 4000 Mbps
RPIs max 1024 RPIs used 4 IOCBs inuse 0 IOCB max 8 txq cnt 0 txq max 0 txcmplq 0
Vport List:
Link Up - Ready:
PortID 0x10e05
Fabric
Current speed 10G
Port Discovered Nodes: Count 2
t0000 DID 010c00 WWPN 50:01:43:80:02:5d:bb:e8 WWNN 50:01:43:80:02:5d:bb:e0 qdepth 8192 max 2 active 0 busy 0
t0001 DID 010d00 WWPN 50:01:43:80:02:5d:bb:ec WWNN 50:01:43:80:02:5d:bb:e0 qdepth 8192 max 2 active 0 busy 0
The most relevant information above is that the driver version currently installed is 8.2.1.90.28, the firmware version is 4.1.450.16 and that the card is a HP FlexFabric 10Gb 2-port 554FLB. Within the recipe PDF linked to earlier, I can see that the most recent driver version is 8.2.4.141.55 and the most recent firmware version is 4.2.401.2215, so I’m behind quite a few versions.
From the recipe PDF, click on the required driver link for your card, which will take you to the VMWare website. A zip file will be downloaded, and inside is another zip file with the word offline_bundle in its filename. This is the driver package we need. Set it aside for the next step. For the firmware, download the latest Service Pack for ProLiant. It’s a big ISO that includes firmware updates for all ProLiant servers and it works quite well. It’s normally updated every 3-4 months.
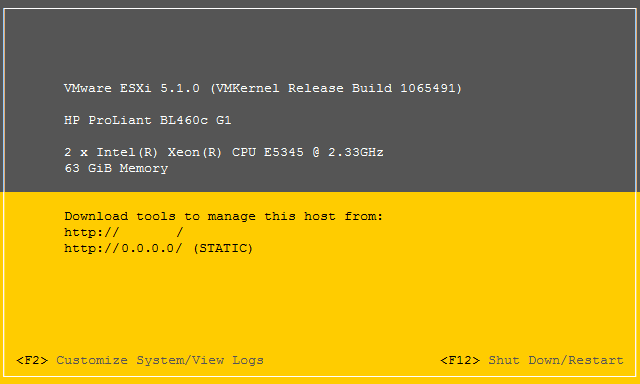
If you’re like me and have some old blades in your environment (like the BL460c G1) with iLO 2, you might find the virtual media function a bit flaky when you mount the SPP ISO. As a workaround, use the HP USB Key Utility (version 1.7!) to put the SPP on a USB drive and use a direct connection to the blade to boot. Don’t forget, the boot menu key is F11.
There is some excellent documentation available on the HP SPP portal for how to use the SPP. The latest version from when this post was written is here.
Use an SCP client (I use WinSCP) to transfer the offline_bundle driver to a temporary directory on the host (I use /var/log/vmware/). Then, SSH in to the host and execute the following command:
A hosts management network interface somehow dropped off the network this afternoon. Fortunately I was still able to get in through iLO. It always pays to have an out-of-band interface active!
From the DCUI screen, press Alt + F1. This will bring up the login screen. Log in as root then type esxcli network ip interface list. You will get an output similar to the one below.
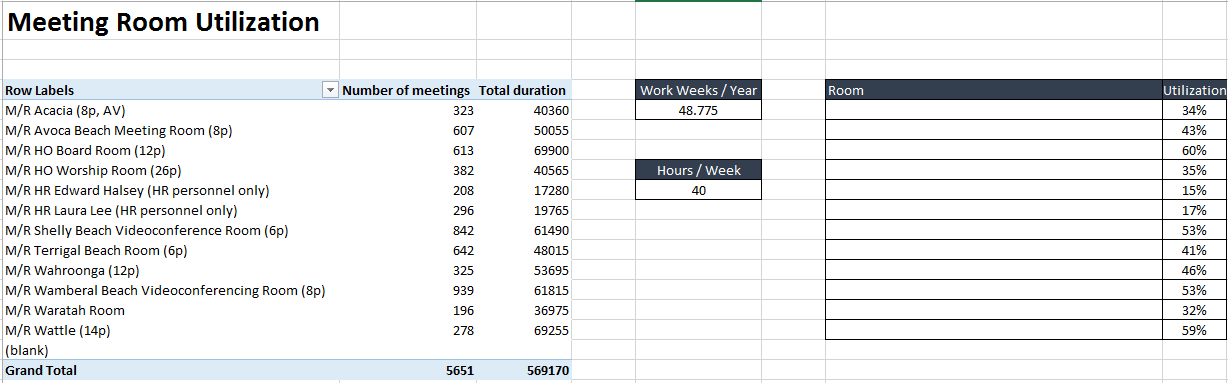
I had a request from a user to find out the meeting room utilization across our head office, but unfortunately I couldn’t find an easy way to do this with Exchange 2010 cmdlets. Here are some instructions to do so with COM objects, PowerShell and Excel.
First create a mailbox that will have the meeting room rights assigned to it, then grant the user access to the required mailboxes so that they show in Outlook:
Open Outlook and add the meeting room mailboxes, then run the PowerShell script below with the appropriate date range. Mine shows the last financial year.
Next, open the CSV output file in Excel then:
Create new sheet called Report
Insert a pivot table containing all the data from the raw data sheet
Drag “MeetingRoom” to Rows
Drag “Duration” to Values. Edit the field settings to be “Count” and rename to “Number of Meetings”
Drag “Duration” to Values. Edit the field settings to be “Sum” and rename to “Total Duration”
Create two new fields – one with the amount of work weeks per year (48.775 for mine) and the amount of hours per week (40 for mine).
Create a new table for utilization percentages. Put the formula as =C5/($E$5*$E$9*60).
I got really sick of changing SMTP settings on Xerox machines manually, so I made a PowerShell script to make it easier. The script can also pull a list of printers from a print server and work from that.
Just change the variables up the top and run the script.
It could be further optimized with PowerShell workflows so it works on each concurrently, but I was lazy.
Not sure if you have tried to download from adobe FTP site lately, however it is exceedingly slow (23kbps slow!). I have this afternoon, just worked out a small hack that makes it a lot faster… so far it seems to work (for the three adobe reader patches I’ve tried anyway).
1
2
3
4
5
1. Find the file on ftp://ftp.adobe.com/
2. Copy the url of the file (including the exe, zip, etc) that you want to download.
3. Replace the first part of the URL (ftp://ftp.adobe.com/) with http://ardownload.adobe.com/
E.g. ftp://ftp.adobe.com/pub/adobe/reader/win/11.x/11.0.07/misc/AdbeRdrUpd11007_incr.msp becomes http://ardownload.adobe.com/pub/adobe/reader/win/11.x/11.0.07/misc/AdbeRdrUpd11007_incr.msp